Pages

Saturday, 28 January 2012

Week 1 *Weigh In*

Hey Guys! 

Just filling you in on my first weigh in for those who were asking !!
 Well i was nervous for the first week being quite honest. I was told not to expect high numbers each week as the first week was mainly water retention.

Most people on this diet are tired and hungry the first couple of days , but I, turned out to be awkward and I was perfectly fine the first couple of days and the opposite towards the end of the week. However, today resulted in good news and I am happy with it because it was a struggle and it should be easier from here on out. 

Today I lost 6.2 pounds.

Have a good week lovelies!!

-xo

Friday, 27 January 2012

EOTD- 27.01.12- Berry Smokey Eye

Hii guys! 

Well this is just a post to show you my EOTD.

If you would like a pictorial on how to do this look please let me know.
This is how the look turned out.


I created this look by playing around with colors from my Manly palette. The palette is extremely pigmented and the colors aren't necessarily unique so it would be likely that you have similar colors to create this look yourself.


I feel this is a classic smokey and sultry look. I hope to hear what you think. 
Please let me know :)


Talk soon
-xo


Monday, 23 January 2012

M.A.C Haul/Review

Hello guys!!

So this year Santa got me a voucher for the Brown Thomas store which sells M.A.C makeup products in Ireland, amongst other things.  So i am just going to share with you what I got.


I absolutely love M.A.C products and it was great to get a voucher because I ran out of my essentials. I decided to get the M.A.C Duo Fibre Brush because I wanted a more even and clean finish.


M.A.C Duo Fibre Brush
I got number 187 of the M.A.C Duo Fibre Brush and I use it for stippling on my foundation and also for blending face powder. Furthermore, it states that it is made from goat and synthetic fibres. The brush itself feels so soft on the  skin and the makeup appears blended , clean and even.


M.A.C Mineralize Skinfinish- Soft and Gentle


The next product i acquired was the M.A.C Mineralize Skinfinish in the shade Soft and Gentle. The packaging it really professional which I love and the product itself is luxurious. It is incredibly soft and has a slight shimmer finish.


It applies smooth and lustrous, it polishes the face and leaves a satin finish. I use it as a highlight, on top of the cheek bones, the bridge of the nose and also on the brow bone . This product will get a lot of use.


M.A.C Studio Fix Powder Plus Foundation- NC20


This product is my favorite out of the lot, and possibly my favorite in general. This is the M.A.C Studio Fix Powder Plus Foundation in the shade NC20 as I am very pale. This is a powdered foundation that leaves a matte and full coverage finish. I never liked powder foundations prior to using this product because it always appeared as though i wasn't wearing any foundation at all. I also love that it has a matte finish because my skin is ultra oily and I did NOT want a glossy looking face. I did not need to apply powder after applying this product. The skin appeared smooth ,blemish free and absolute almost completely flawless.


It claims to stay on for 8 hours which I would be inclined to agree with.


The last product I want to discuss , is the satin lipstick i got. 


M.A.C Satin Lipstick- Snob


This is the M.A.C Satin lipstick in the shade of Snob.  This lipstick has actually got a soft scent to it. It is not sticky which i notice with a lot of lipsticks and it has a real creamy texture to it which i LOVE!!!  I will definitely be getting more lipsticks from  M.A.C once i have the money of course. 


That's everything I got. If you have these products let me know, or if you have any questions!! :) 

Talk son-xo 


Sunday, 22 January 2012

Life* Update*

Hii Everyone!

This is just a short update to fill you in. 

So, I'm finally finished my exams :) and I started a diet. Each week i will be weighed in so i shall fill you in on what is involved and how much is lost each week .At the end I will show you some before and after photos. I may, show you photos as we go along, that is really up to you. What do you think?


Friday, 13 January 2012

How To Make Your Eyes Look Bigger

Heey Guys!!

First off , I want to say sorry for not posting in a while, i had really hard law exams which i had to study for, so there was no computer near me!

So i'm back , for another while anyway :)

Today I want to talk about  How to make your eyes look bigger !!
They're are 7 steps in my opinion.


  • The first rule of thumb is to apply the lighter shadow on the inner corner of your eyes (even the tear duct). For those of you who are not quite sure where that is, this image will clear things up.

Inner corner = yellow dotted area

  • Secondly, it's a good idea to apply the darker shade to the "outer V". This will elongate the eye almost immediately. Once again i'll enclose a picture for clarification.


Red line = outer V

  • Thirdly, which is optional, but i choose to do it, is to add a matte shade to the "crease " of your eye and blend like crazy. This will add depth to the eye, thus, giving it that "pop".
crease=dark shadow above lid

  • If you want to apply black eyeliner apply it to the upper lash line. If you apply it to the lower lash line it will instantly make your eyes appear narrow and small looking. Furthermore, it's been recommended, to add white eyeliner to the lower lash line. 

  • A winged cat eye also makes the eye look bigger. This is where you extend the liner past the outer corners of your eye.


  • It is important to have shaped eyebrows. It would be a waste of time to have put in so much effort and left an ungroomed eyebrow. A tidied  eyebrow will look more noticeable straight away.

  • (Optional)- Apply false lashes to the eye, sometimes even the lower lash line. Others recommend not wearing mascara on the lower lashes and say that it has a great effect, but i can't do that personally, as i feel like i have a naked eye.

Finally, this is an image that encapsulates all of the above steps in one look.


Hope this was helpful and that you enjoyed it. If you have anything else to add , please do

Talk soon !! :D


Disclaimer= Photos are not mine and were obtained from Google.


Saturday, 7 January 2012

NOTD- 8.01.12 - Purples

Heey Guys!!

This is going to be a short and quick blog post because my internet is acting up!
I find it really weird when the internet stops working and then it says it will try find the solution online.!? (If i could do one eyebrow up and one down I would)

Anyway , enough of that. I decided it was time to do another NOTD because I haven't done one in a while and  it's Winter. It is however , a coincidence that it is Avon again. I think warm colors are important for Winter so I feel this color should do the trick.

Avon Nailwear Nail Enamal-Decadence


I got mine in the shade - Decadence. As you can see the front has faded off due to wear and tear ,perhaps?.  I find this polish to be relatively sheer, although it only took me two generous applications to achieve the opacity I was looking for. It dries incredibly fast, before I was finished my second hand the first was already dry. I didn't apply a top- coat so I can test it's durance to chipping, because it has been a while since I've worn it. 

It took me about 4 minutes to do this in total, (rushing) and i was satisfied with the results. My apologies as the application is a bit sloppy.

Here we go..


This color is very intense and leaves a shiny wet look. There is a hint of shimmer apparent as well. It has an even consistency which is a major plus. I have it a long time and yet it still isn't sticky or messy. It retails for approximately £1.99. I will include the link of where you can purchase this , if you would like.

Over all I would recommend this polish, it's quick to apply and quick to dry and it also it quite a good bargain.


Let me know what you think of this polish.:)

Talk soon :)

Friday, 6 January 2012

New Drugstore Goodies

Hello again ! :)

Just wanted to tell you guys that I got two drugstore products today. (yay)
One of the things I got this year for Christmas (love Christmas) was a voucher for a pharmacy called "Boots", so i decided to head in there and have a look. I actually wanted to get something from Kate Moss's lipstick collection, but they were all out. On a brighter note, I got these two babies.

Maybelline  Eyestudio Lasting Drama Gel Liner

Rimmel London Glam'eyes Day 2 Night(pink)


The first one is Maybelline  Eyestudio Lasting Drama Gel Liner.  Firstly it comes in 4 shades and I got the blackest black.I haven't tried this yet, but when i have I will do a review on it. It is supposed to have a real creamy texture and smooth application, however I have heard that it does not stay on that long and also that it smudges. It claims that it's 
  • Oil-free.
  • Smudge proof and water proof.
  • That it lasts up to 24 hours .
  • Safe for sensitive eyes and contact lens safe.
So i feel does have mixed reviews to a degree and I cannot give my opinion on this product as of yet. I think the packaging is pretty appealing, especially the little jar it comes in. It also comes with a brush ,which I think is a plus. I mean they didn't have to give us that , did they!? More for us .

The second item I got was Rimmel London Glam'eyes Day 2 Night(pink).  Now this is my favorite Mascara of all time ( well for now anyway). I've been wearing it for, God knows how long, but it is really good. I prefer it to M.A.C mascara , and that's my honest opinion. I had to get this because my other one ran out. There's also a blue one, which I have no idea what the difference is. There is two wands, per se, for application. The first one is for length and the second is for volume.  My eyelashes are short and blonde and this does exactly  what it says it will do. I highly recommend this product.

Anway that's everything I got. Let me know what you think. :)


Disclaimer: photo's are not mine.


Thursday, 5 January 2012

Benefit Play Sticks *Review*

Heey guys!

I really loved the idea of Benefit (still do), but i had never actually owned anything belonging to them. So it was great to finally get something from their vast range of products!

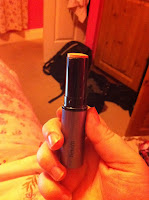
A while back ,I got the Benefit Play Sticks and Benefit Erase Paste   in store and decided i'd do a little review on them. So firstly i'll show you what the packaging looks like..


The shade I have here is spin the bottle , but they likewise have them in several other shades.


This product does come in panstick form,however, I usually steer clear of pansticks as i find them really harsh on my skin. It does have a high consistency and you only need a little bit per application.

It also has pretty full coverage and a creamy texture (which i love). It brightens up your face and leaves a radient glow.

Sorry for the mess behind in the background

I have noticed that my face was quite shiny(residue, oily?) afterwards, so i did need to apply a generous amount of powder. I have been using this product for a couple of months now , and I am very pleased with it. I would definitely get it again but it is expensive. However, I was addicted to Revlon color stay for a while and that retails for €17.50 whilst top brands are only a couple of euro more. So if the money was there, it would be worth considering .

I did do a swatch on my arm for you guys, it's a yellowish color to even out the red pigments in my skin and it blends in evenly giving a clean, almost natural finsh.


What do you think of this product? I'd love to know.


Speak soon :)

Wednesday, 4 January 2012

EOTD-Urban Decay Naked Palette Tutorial

Hellooo guys!! How are we today?


Okay first of all, the quality of pictures on my camera seemed much  better than how they turned out on the computer!! I'm not sure how to fix it , but i'll figure it out sometime. Hopefully you'll get the idea from the photos. Here is how they turned out .. 


I also have a photo of what it looks like when my eyes are opened .(I have hooded eyes so it may be difficult to see).


Anyway , that's how it turned out! This was after going out for a few hours as well. I am not quite sure you can see due to the quality. In order to achieve this eye look, I used a white shadow from Avon's Smokey Eye Quad  on the brow bone as a highlight. I then used    
Urban Decay's Naked Palette (the first palette, not the newest one) for the rest of the look.

  • I used the  Urban Decay Primer Potion on the lid to prep them-prevents shadows from creasing & it helps the shadows stay on longer (definitely works!!).
  • I actually applied scotch tape (sellotape-that's what we call it in Ireland) to the side of my eyes - to give the shape at the outer V and to stop it from falling all over my face which I can't help but do.
  • Then I used Sin from the palette on the lid as base - to make the colors more vibrant  & stand out more.
  • Hmmm... Then! I applied Half Baked to the lid and worked it right in to the inner corner.
  • Next, I used a random drugstore liquid eye liner(Not sure the name , i just needed the felt tip brushed ones) from the middle of the eye all the way out to the outer V and blended like hell!!.
  • Lastly, I used Creep on the outer V and crease and blended like there was no tomorrow and dragged it under the eye to open them up. ( my eyes are small & hooded).

I think that's everything,? 

If i forgot something to mention let me know. What do you think? If you can see it haha

Talk soon :D


Tuesday, 3 January 2012

Benefit -Erase Paste *Review*


Hello again Laddies and Lassies!

So i got the Benefit Play Stick and the Benefit Erase Paste from the benefit counter in Debenhams as a treat. I've been using it for a couple of weeks now so I hope my opinion will suffice for you guys. :) I'll talk about the Play Stick in another blog :)


The only issue i could find with the erase paste, is that they didn't have them in a wide variety of shades, but that's fine for me ,because I am as pale as a ghost. Anyway, mine is no.1 fair. It's full coverage, and its yellow based ,to get rid of those red patches and dark under eye circles. It's got a creamy texture to it too.I personally think it's worth the price. I wouldn't be the one to normally spend that much on a concealer -unless it was as good as this one! So it's a yes from me anyhoo.

It also comes with a "lesson" ,which is a basic tutorial of how to use it. There's a spatula in there too.


I think it is worth it and it stays on for a long time. However, this is just my personal opinion. What do you think ?


Hope you like :)

Talk to you soon

Color trends for this Winter 2012 (Trendsetting)

Hey Guys and Gals!! Usually, every winter we deal with mostly neutral colors. However, this Winter is different. It seems that a lot of designers are using more  
stand-outish colors, vibrant tones. It is a lot more conspicuous and very distinct. I think this season is more of a daredevil approach.- and i like it !! Do you?


 Beautiful teal chic dresses

The colors- Teal, taupe, reds,purples, golds and shimmers/glitters are more prominent this season.

As always neutrals remain popular at this time!!
winter 2012 collection from several designers (neutrals)

I am not so sure if the hairstyle "balayage" hairstyle will remain "in" as they say. I hope it does because I think it looks elegant , stylish and classy at the same time. But i'll talk about hairstyles in my next blog.:)
Anyway, heeled Boots and prints seem to be dominating the scene as well. (We've got choices)

The brighter hues can be seen everywhere in many combinations .(Sooo many)
I searched google to try find a good example of the vibrant combinations, and the best one i could find is below.


Winter has some great looks in store for us. A lot to choose from. 
Hope you enjoyed this & decide to follow me.

Talk soon you guys!!

:)


Disclaimer:These pictures are not mine, i got them on google and www.millionlooks.com